You have just installed a new capsule filling machine. The supplier has completed the setup, run a few test cycles, and declared it ready for production. But how do you know—with measurable confidence—that the machine will consistently fill capsules within your specified weight tolerance across an entire batch?
Validation during commissioning is not simply running a few capsules and checking they look acceptable. It is a structured process of documenting fill weight accuracy under defined conditions, identifying sources of variation, and establishing baseline performance before routine production begins.
This article provides a practical framework for validating fill weight accuracy during capsule machine commissioning. You will learn sampling protocols, statistical acceptance criteria, and the most common failure points that commissioning tests often miss.
Routine production checks—typically weighing 10–20 capsules every 15–30 minutes—serve to monitor stability. Commissioning validation serves a different purpose: proving that the machine, tooling, and material combination can achieve specified accuracy under worst-case conditions.
According to a 2023 guidance document from the International Society for Pharmaceutical Engineering (ISPE) on solid dosage form commissioning, “performance qualification (PQ) for capsule fillers should demonstrate fill weight consistency across the entire operating range, including start-up, steady-state, and near-end-of-batch conditions.”
The key difference: commissioning tests deliberately challenge the machine at extreme operating points. Routine checks only verify normal operation.
| Aspect | Routine Production Check | Commissioning Validation |
|---|---|---|
| Sampling frequency | Every 15–30 minutes | Continuous sampling across defined phases |
| Operating conditions tested | Normal setpoint only | Low/mid/high speed, low/high powder hopper levels |
| Sample size per test point | 10–20 capsules | 50–100 capsules for statistical confidence |
| Acceptance criteria | Within ±5–10% of target | Within specified tolerance (±2–3% typical) |
| Documentation purpose | Batch record compliance | Equipment qualification for regulatory filing |
Follow this step-by-step protocol during capsule machine commissioning. Do not skip steps 3 and 4—partial hopper and speed ramp testing reveals issues that steady-state testing hides.
Before running any capsules, document three factors that significantly affect fill weight:
Powder or pellet bulk density (measure with a 100 mL graduated cylinder, three samples)
Ambient relative humidity (target range depends on material hygroscopicity)
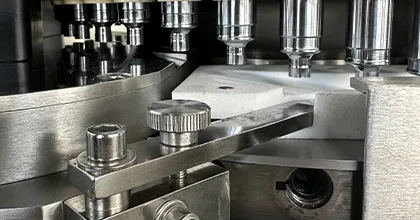
Tooling condition (new or used dosing pins/discs; record serial numbers)
Research published in the Journal of Pharmaceutical Innovation (Vol. 18, 2023) found that “failure to document baseline powder density prior to commissioning accounted for 34% of disputed fill weight deviations between equipment suppliers and manufacturers.” Measure first, then run.
Agree on three numbers with the supplier before running any capsules:
Individual capsule weight range (e.g., target ±3% or ±5%)
Mean weight deviation (batch average within target ±1–2%)
Relative standard deviation (RSD) acceptance (e.g., RSD ≤ 2% for powders, RSD ≤ 4% for pellets)
Write these criteria into the commissioning protocol. Without pre-defined limits, you cannot objectively pass or fail the machine.
Procedure:
Fill hopper to 80%+ capacity
Run machine at the speed you intend for routine production
After 5 minutes of warm-up (discard these capsules), collect 100 consecutive capsules
Weigh each capsule individually, record gross weight (capsule + fill)
Calculate mean, standard deviation, RSD, and range
Acceptance criteria (typical industry benchmarks):
| Material type | Individual weight range | RSD (max) |
|---|---|---|
| Free-flowing powder | ±3% | 2.0% |
| Poor-flowing / cohesive powder | ±5% | 3.5% |
| Pellets / granules (0.5–1.5 mm) | ±6% | 4.5% |
If the machine fails at nominal speed with a full hopper, do not proceed to more challenging tests—resolve the root cause first.
This step is where hidden problems surface. Run three additional test conditions:
Test A: Low hopper level (10–15% remaining)
Many machines show fill weight drift as powder height decreases (reduced head pressure)
Acceptance: Mean weight shift ≤ 2% compared to full-hopper test
Test B: Minimum and maximum machine speed
Run at 60% of nominal speed and 110% of nominal speed (or supplier’s stated range)
Acceptance: RSD ≤ 50% above steady-state RSD at both speed extremes
Test C: After 10-minute idle pause
Stop machine for 10 minutes, then restart without any adjustment
Collect first 50 capsules after restart
Acceptance: First 10 capsules within individual range; mean of 50 capsules within 2% of pre-idle mean
A 2024 technical report from the American Association of Pharmaceutical Scientists (AAPS) noted that “over 40% of capsule filler commissioning failures are first detected during low-hopper or restart testing, not during steady-state operation.” If your supplier only demonstrates steady-state performance, request these additional tests.
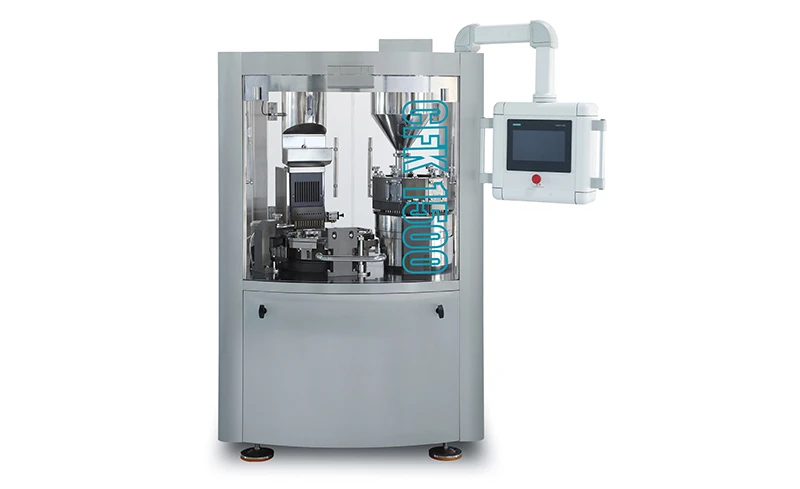
If you are validating a double-station capsule filler (e.g., 25+ segment bores with two independent filling stations), station-to-station variation must be quantified.
Procedure:
Collect 50 capsules from station A and 50 capsules from station B (requires machine with segregated discharge or manual intervention)
Compare mean weights between stations using a two-sample t-test (or simpler: require means within ±1.5% of each other)
Document maximum individual capsule weight from each station
Acceptance criteria (industry common practice):
| Metric | Acceptance |
|---|---|
| Mean weight difference (station A vs. B) | ≤ 1.5% |
| RSD difference (station A vs. B) | ≤ 0.5% absolute |
| No station consistently produces heavier/lighter capsules | visual check of sorted data |
For facilities using double-station machines, understanding the root causes of station-to-station variation helps during commissioning. See the architecture overview in the capsule filling machine series →.
After completing all test conditions, produce a commissioning report containing:
Mean weight, RSD, and range for each test condition
Any adjustments made during testing (e.g., dosing pin depth changes)
Recommended in-process control limits (e.g., check every 100 capsules, action if 2 consecutive capsules outside ±4%)
Set control limits wider than acceptance criteria to avoid nuisance alarms. Example:
| Parameter | Commissioning result | Suggested control limit |
|---|---|---|
| Individual weight range | ±2.8% | ±4.0% |
| Mean drift over 30 min | ±0.8% | ±2.0% |
Knowing what typically fails helps you watch for these issues before formal validation begins.
Symptom: Individual weights are within range but mean drifts upward or downward over 30–60 minutes.
Root cause: Dosing pins not locked securely; vibration causes a gradual depth change.
Fix: Re-torque pin locking mechanisms, apply thread-locking compound where appropriate.
Symptom: Excellent fill weights for 20 minutes, then sudden light capsules, then return to normal.
Root cause: Powder forms an arch over the hopper outlet; powder flow stops temporarily until vibration breaks the arch.
Detection method: The low-hopper test (Step 4) often triggers or reveals bridging issues.
Fix: Install a mechanical agitator or a different hopper geometry (cone angle < 60 degrees for most powders).
Symptom: Fill weights vary cyclically every 30–60 seconds.
Root cause: Plant air supply pressure fluctuates; vacuum level drops when other equipment cycles.
Detection method: Monitor vacuum gauge during commissioning test. Pressure drop > 10% indicates inadequate supply.
Fix: Dedicated vacuum pump or air receiver tank for the capsule filler.
Symptom: Fill weight pattern repeats every full indexing cycle (e.g., every 24 or 36 positions).
Root cause: Indexing box position error causing inconsistent dosing pin penetration depth.
Detection method: Plot fill weights in sequence of capsule position. A repeating pattern every full turret revolution indicates an indexing issue.
Use this checklist during your next capsule filler commissioning:
| Step | Activity | Completed |
|---|---|---|
| 1 | Document powder bulk density, humidity, tooling IDs | ☐ |
| 2 | Define acceptance criteria (range, RSD, mean drift) before testing | ☐ |
| 3 | Full hopper steady-state: 100 capsules, calculate RSD | ☐ |
| 4 | Low hopper test (10-15%): mean weight shift ≤ 2% | ☐ |
| 5 | Speed ramp test (60% and 110% of nominal) | ☐ |
| 6 | Restart test after 10-min idle: first 10 capsules in range | ☐ |
| 7 | Double-station only: station A vs. B mean difference ≤ 1.5% | ☐ |
| 8 | Document control limits for routine production | ☐ |
| 9 | Sign off commissioning report with supplier | ☐ |
Once fill weight accuracy has been validated during commissioning, the focus shifts to maintaining that performance. Routine monitoring should use narrower sampling intervals initially (e.g., every 15 minutes for the first three full batches), then relax to standard intervals once stability is confirmed.
Retain the commissioning report as a baseline. If fill weights begin drifting months later, re-run the low-hopper or speed ramp test to determine whether the issue is material-related or machine-related.
For production environments requiring validated accuracy across multiple formulations, see how customized validation protocols are structured in the solutions overview for the pharmaceutical capsule filling machine →.
Powder flow characterization methods for capsule filling
Understanding fill weight RSD: acceptable ranges for powders vs pellets vs granules
Changeover verification: how to validate fill accuracy after mold changes
Vacuum system sizing for capsule fillers – avoiding pressure instability
Documentation requirements for capsule filler performance qualification (PQ) in regulated markets

No. of station:26/32/40
Max.tablet diameter:25/16/13mm
No. of station:45/55/75
Max.tablet diameter:25/16/13mm
24/7 Online Technical Support
One-Year Warranty and Spare Parts Coverage
Lifetime free technical consulting service
GET A QUOTE